Monday 31 August 2015

Oven Roasted Masala Cashew nuts / Kaju

Next time you get Cashewnuts Dont forget to try making this simple muncher!! I can vouch that this going to be vanished in no time..... Elders and Children irrespective all age groups and gender will love this.  Be prepared to make this in large batch before giving anyone to taste you will be asked to serve more n more pakka ;) ;)


Hello Readers 
Hope each and everyone is doing good at their respective ends!! If you had been waiting for my posts then I'am really sorry to disappoint you for being missing for such a long time. Wedding preparations is what I am hooked to right now!! Ahhhhh.... its tiring, wedding shopping does'nt seem to be easy I feel I am finished lol!! Yes I am getting married next month and I dont know how many would be brides feel the same as I do right now!! This shopping is not mood lifting at all grrrrr. I literally cannot think of editing and blogging. But here I am for you guys with this quickie recipe which I tried yesterday.

Yesterday my nana came from Orrisa in the evening and it was the same time when I reached there with mom and aunt after a tiring shopping session. My nana asked me to take cashewnuts he got for our journey to be today to ajmeer. At 1st I said Na Na (nana) Noooooo......... Fatss!!! And he comanndingly said take it and roast it will be good for your journey. 

Dimag ki batti jali ( Tingggg.....) 
mom said ok roast it give half to nana and we shall take half. I instantly said mom why take home got oven here i'll do it here and me gone into the kitchen with all the energy dont know where it came from... lol

Dont worry it takes no energy to make this until you choose a open pan roasting method. I'am talking about energy because that's how dull and down I feel these days. After half an hr you see the results here. Yes I dint spare my aunts new dress to be used as prop for the photography ;)


A quick look at the ingredients and method.

Ingredients 
Cashewnuts - 500gms (whole / split)
Salt to taste
Turmeric powder  as per needed
Chilli powder as per needed
Oil - 2 to 2 tbsp 


Method
Take cashewnuts in deep bowl add oil, salt and spices accordingly, mix it nicely so that everything gets coated nicely.


Method - Grease a tray and arrange the cashewnuts. Bake it for 20- 30 mins in 180 degree in preheated oven.
- Take out twice and mix it. again put in for baking. Dont bake it for 20-30 mins at a stretch it may burn the cashews from 1 side.
- Remove add more chilli powder and salt after tasting. Add other seasonings if you desire. 
- Wait until the whole batch cools down before serving. 


Notes:
- Add spices according to your family taste level.
- At the end part before serving do add little bit of more salt and chilli as cashewnuts will tend to give sweeter taste once it cools down. Adjust it accordingly
- Use chaat masala or aamchur powder in the end instead of salt and chilli for a different taste.
- Use pepper for a change if you want
- Store in a air tight jar only if u get any left overs ;) lol 


I may categorize this for diwali preparation in advance to make something healthy and gift it to your loved ones :)

Roasting without oven: If you dont have oven and wish to make the same, take a large pot or kadai in which you can make mixing movements freely!!
Roast the nuts in low to medium heat making sure you dont burn it. Your constant presence is very much needed as you keep mixing. This will ensure even heating and roasting!!


I dont have to speak about what happened once my appointed task was completed!! It was handed over to nana and then everything distributed :O lol that was a quick!!! and here my cousin took her share. When I asked her for a click this is what she did ;)


Try this quick recipe and enjoy your healthy snacks!! Any quire do comments below. I will reach you quickly at my possible best :) 

until next bubye.............


Continue Reading

Sunday 5 July 2015

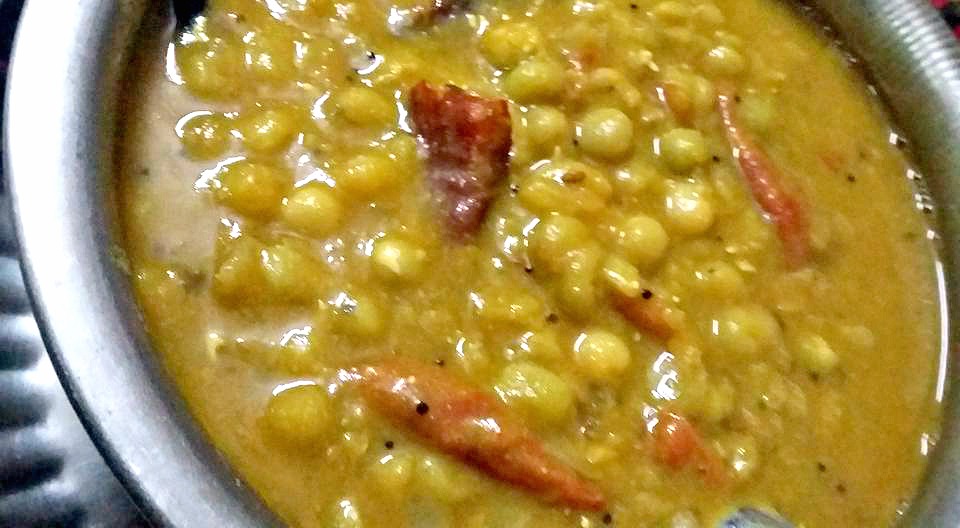
Ghugni - Dried Peas Gravy - Pressure Cook Method

 If I can talk about comfort food. This simple ghugni which is highly flavorful and rich protein can never let you down with its taste!!


Lets have a short look over what is ghugni or ghoognee. Its a famous street food of Bengal, Assam, Orrisa and Bihar. Usually served as it is as chaat / made like gravy style and served with hot pakoda's / Served with flat Indian breads like puri paratha and rotis. With all different states having ghugni as specialty  there are high level of variations involved in the process of making it.

Basically Dried White peas or Dried yellow peas is used for making it. But I'am making use of  Dried Green Peas for a  different reason which I'll discuss it later in the article.

Sometimes Iftar for most of us becomes an excuse to have loads of junk food which can be a real trouble or considered as a bad diet. Females have a tough time to choose what to make for family at this point. And when kids and men have special demands then it more difficult to keep a check of healthy food. I decided to make ghugni this Ramadan as it is light and filling, packed with low carb and high protein yet very low in fats. Though ghugni is among my most liked food but still it was left unnoticed and forgotten for long dont know why :) Im sure it happens to all of us at a point of time. I had served it with pakoras and just yumm yumm!!

Getting back to the recipe

1 cup dired green peas should be soaked over night or maximum 5- 6 hrs. This ensures easy cooking, easy on tummy and no gastric formations. Once soaked get started with the cooking process

Ingredients
Onion - 1 large chopped or 2 medium size
Tomatoes - 2 large or 4 small size
Ginger garlic paste - 2 tsp
Red Chilli powder - 1/2 tsp
Coriander powder - 1.5 tsp heaped
Turmeric powder - 1/4th tsp
Garam Masala - 1tsp
Water - 1/4th cup + 3-4 cups more

Temperings:
Oil - 2 tbsp
Mustard seeds - 1/2 tsp or a little more
Methi seeds - 1/4th tsp
Cumin seeds - 1tsp
Dry Red Chillies - 4-5

Method:
- Add oil in a cooker and add tempering starting with mustard seeds, allow it to splutter in medium flame, Once it splutters add all other ingredients listed below temperings and cook over low flame till nice aroma emits, Make sure dont burn these, its very essential part for flavorings
- Add Chopped onion, tomatoes ginger garlic paste and all dry spices, add 1/4th cup water, salt  and all dry spices, saute it well for 3-5 mins in medium flame till nice aroma emits and all the raw smell fades of, oil starts leaving its sides (since less oil is used here, chances of oil leaving sides are minimum so go with the aroma).
You can also lower the flame and close the cooker pan with any lid, this will ensure slow cooking of masalas while you do other works (just an option, I do this and get back to room to escape humid weather of chennai :D )
- Once nice aroma is emitted and you find onion and tomatoes mushy coated with other masalas. Now add soaked peas and water 3-4 cups. Cook for 2 whistles.
- Allow the pressure to release on its own and you are ready with wonderful gughni.

Alternate method 1
Pressure cook peas with water for 2 whistles allow it to release on its own.
Prepare tempered masala base in a kadai and mix the pressure cooked pease into it. Mix well check for salt and spices, adjust consistency with water, give it another boil. Garnish and serve.

Alternate method 2
Prepare the base masala and blend it if you dont like chunks of onion and tomatoes. Make sure you minimize the dry chilli to 1 or 2 / Remove chillies before blending. Follow with pressure cooking peas option before or along with the spices base is your wish!!


Note
- Add spices according to your taste.
- You can use white / yellow dried peas but personally I find those peas remains soft only till it is hot. I find dried green peas quick in cooking as well as mushy enough to be eaten with pakodas or when used for any side dish. However if you got the trick to keep yellow / white channa be soft even after it cools down after cooking go for it!!
- You can add lemon juice or dried mango powder if required for some tangy taste. But here the tomatoes I used were very sour so I did not add anything more to this.
- In case tanginess is felt more you can add some sugar and adjust it (very little)
- Adjust water as you like, Open stir cook the peas mixture for thicker gravy or add more water incase the gravy is too much thick than you desire.
- Can be kept in fridge upto a week stored in air tight container.

For making chaat similar to Ragda:
- You can omit tempering and make the ghugni as it. This can be later served with green and sweet chutney, raw onions along with samosas kachoris,  pakoras some nylon sev and coriander leaves. Go easy with your addition and enjoy tweaking the recipe as your likeness!! (spice level for chaat is perfect measurement as given in above recipe)

To Serve with Roti / bread / Puri / Paratha / Khakra / Idly / Dosa / Idyapam (yes it goes well along everything!!
When you have intention to serve this along the main course then make sure you do the tempering part as well as have the spice level more so that it gives a perfect taste when eaten with bland food!!

Hope you enjoyed this wonderful post of having ghugni as chaat and side dish both do try out and have fun with cooking!!

Until next cya.............


Continue Reading

Friday 3 July 2015

Shawarma Bread Rolls

 These mini cuties so much tasted like shawarma filling hence named it as shawarma bread rolls.


Sometimes imagination takes us very far, and this was something which was running in my mind imaginatively for quiet sometime. Finally I tried and here was the result!! One of my best trial and a keeper for sure. This was made along with my previous post Sago Vermicelli Kheer - Energy booster Dessert / Drink . Take a look if you havent yet!! 

The way kheer was made in large quantity similar was the case with these rolls, my 1st attempt with a large batch to be sent was a risk factor but its always better to do something than to be void without even giving it a try. There are many bread roll recipes across web after lots of browsing I did not find anything similar to what was going inside my head. As I kept making I was confident about the shape and size, The only thing bothered me was the filling and how well does it get along with bread and gram flour coating.  I'll talk my trial and errors as I proceed with the post. Getting started with the recipe.

Preparation done here was a large batch. But I'll give measurement for 4- 8 members with generous servings possible :-

Ingredients for filling
Mixed veggies consisting of Cabbage, Onion, Carrot and Capsicum - 1 cup each (you may add or subract veggies as per your choice this is just a basic measurement for better understanding.

Boneless chicken - 100gms or more marinated with 2tsp ginger garlic paste and some salt for few hrs or over night (optional) can be done instantly too. Marinating gives better flavor and tenderness to the chunks.
Some mayo - 1/2 cup or more as you like
Garlic pods - 5-6 large chopped finely
Green chillies - 2-3 depending upon how much hot you like
Black pepper powder - For extra taste and spice
Some Salt and sugar for seasonings
Soy Sauce - 1 tsp

Method:
- Heat 2 tbsp oil in a pan and saute the marinated chicken till all the sides golden brown. All the juices absorbed and chicken is well cooked (takes around 5-7 mins in medium heat)
- Once done cool down and shred the chicken using your hands. (if you frustrated over something here is a way to take off all :P just kidding :)
- There will be some remaining oil or just a little grease from chicken mixture. Heat the same pan and add in all the veggies along with the shredded chicken. Add soy sauce, salt and sugar Saute it for 2-3 mins in high flame just till the veggies start to get soft. do not allow them to become very soft. It should just be little soft yet crunchy. 
- Remove this in a deep bowl or another kadai to cool it under fan. Now add pepper powder, chillies, chopped garlic and mayo. Mix it all well and check for the taste which suits your taste buds best. (add / subtract seasonings as per your choice eg: less peper powder, omitting chillies and using only pepper powder more salt / sugar just go along with your taste) 
Add more mayo if you want a richer taste!! I like it rich in taste!! 
- Once this is prepared keep it aside for use.  Whole thing takes 10 - 12 mins hardly dont get worried with my long texts, Its a process done in a jiffy when all ingredients are ready to be throw into the pan.

Other ingredients needed
Sandwhich Bread Slices - 1 pack Sides Trimmed (normal small size will work good too but take care to the sizes. This has to be later dipped into gramflour batter for frying.

Soft butter to apply over bread!!

Gramflour batter / Bajji Batter
Gram flour / Besan - 2-3 cups mixed with 1/2 tsp of red chilli powder, 1/4th tsp of baking soda, Salt to taste. Add water to make a smooth nor thick nor thin paste. (see the bread pic below) with thick batter bread will become too heavy therefore making the bread coating difficult. If the batter is very runny it may possibly lead the bread rolls to not hold the filling inside properly so just make a batch you will know best consistency to be used!!

Optional : can add dried herbs / pepper powder for more flavoring. Instead of gramflour one can make batter from equal amout of maida and cornflour salt , seasonings + water. 

Method:
- Take each bread slices over rolling board and press it nicely to make it flat with rolling pin. 
- Once nicely pressed apply butter just to give a thin coat over filling
- Place the filling exactly as show in the pic below in the center and well shaped. Dont try to add more fillings than required.
- Apply gramflour batter to the other end for proper hold and sticking.
- Start rolling the bread from your side over the filling and reaching to the other end where the gramflour batter is applied 
- Give a firm press roll it and keep it aside.
- Prepare all the bread slices till the filling / the bread slices lasts!!


- Once you roll it as keep it aside you can cut them into half for better grip while frying. The rolls shown below were perfect size for me to work with!!


- Dip these prepared rolls into the gram flour batter and fry till all the sides nice a and golden brown in medium heat. (make sure you coat all the sides properly, if not done it might risk fillings to come out and float in oil)
- Serve hot with Ketchup / Green chutney / Pickled Veggies


Notes:
I have explained my possible best in the ingredients and method part hence making the post look so very big, Please read it carefully before trying!! Once tried hands into this become master of the game!! People will keep asking for more and more

Variation:
For Low calorie snack
Health conscious people may omit the gram flour part, dipping and frying!! Just place the rolled up bread in the greased tava and roast it till golden brown both the sides, Serve hot with ketchup.

This is when my lil cousin sis started shouting Bread Shawarma.............. Give me more give me more :) 


Vegetarians can use soya chunks or paneer instead of chicken.
moong daal sprouts is another great addition to this recipe for more nutritional fact.

For girll smoky effect in chicken pieces:
Chicken pieces can be marinated with curd, general spices, gg paste and salt add some red color, saute it till burnt effect is achieved. Use this along with veggies and fill into the breads. 


Impression
So the mystery was solved once we started our  iftar  I was late to join others. And mean while my youngest aunt called up saying " Those bread rolls I kept hearing from such long!! Finally you made and it was yumm everyone here loved it"  So I was sure other relatives would have liked it too!!

My parents loved it too!! My Dad Claimed it was 1st Class!! What more do I need for credit in my 1st trial and error session???
Sadly my bro cannot be on normal diet for a month more will make for him once he is out of his medicinal diet!!


I have given possible best explanation for this recipe. Do read it carefully and understand it before giving it a try. Reading will simplify your work to larger extent than worrying about a lengthy procedure you may possibly feel :)

Any more quire or suggestions do let me know

Until next Cyaa.......


Continue Reading

Saturday 27 June 2015

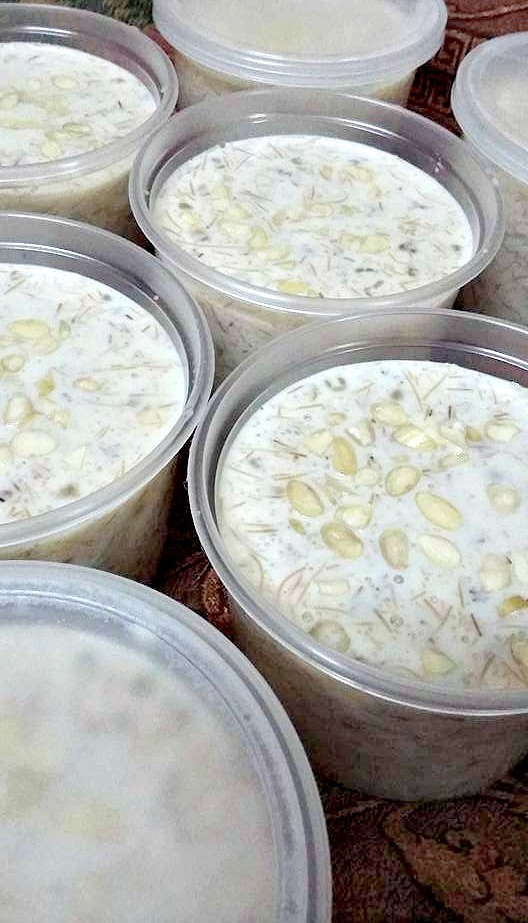
Sago Vermicelli Kheer - Energy Boosting Kheer

Milk is my 1st Love and I go for anything made up of milk. Sweets based on milk hold a weak nerve to me. The richness and flavors it gives when worked well with can put anyone wanting for more.


Me and my bro love milk, we really dont bother if someone asks us, you still drink milk???
My online friends who know milk can substitute my main meal call me Billi (Catty) I dont mind haha I dont know why but for various reasons one love to call me Billi. 

Every year my family and relatives have a traditional practice of exchanging Iftar Food with each other. Its a tedious process I'm sure everyone now is not interested to continue the tradition but by force have to do because when someone sends us Iftar It becomes like a duty to send them back too. Sometimes I wish I could talk 2 all of them during Eid meet and stop this lol ;) its obviously something my mom would never allow me to do (Keep dreaming aara) Anyhow exchanging food is considered to be blessings and this is a special blessing of Ramadan Alone :)  any pains is ok for a while!!

Every year I've been highly trying to cut off the expenses, tweaking iftar menu to something simple etc etc, its always something something for which I keep arguing with my mom, some she would agree some not :P Every mother and daughter had this kit kit (quarrel) I can vouch for!!  

This year it was my instinct to make a healthy kheer for my relatives instead of making Rich and Heavy yet heavenly tasting Bread halwa. I wanted to add my love to what I'am going to make, Instead of oil, ghee, sugar, bread n milk oh it gives me goose bumps coz Im the one who needs to keep tasting for accuracy as I make it lol. Yes tasting as we prepare sweets in night and most of the preparation is done at night itself, saves us from fasting and getting tired easily in day hours. 

So I had nailed kheer for this time and my mom easily agreed to me this time, no kit kit Wow!! when I said bread halwa??? its so rich bla bla bla everything what I can say to convince her :D 

This is my sole experiment where I tried to club up few energy boosting ingredients which can give a real kick to the body once consumed trust me ;) its delicious!!

I made into large Quantity using 3liters of milk + water 1.5liters or more, sago 150gms, thin vermicelli 200gms roasted, semolina, and donno what amount of sugar. But here im going to share recipe for 1 liter milk so you can easily manage making kheer for 8-10 people,  not like me 8 to 10 houses of relatives :D


Ingredients
Full Cream Milk - 1 liter
Water - 750ml or more
Sugar As needed
Sago / Sabudana / Jawarsi - 1/2 cup (washed and soaked for 5 hours or over night)
Vermicelli thin variety - 1.5 cups (roasted well)
Semolina roasted in ghee - 2 tablespoon
Cardamon n Kesar for flavoring ( I used Everest Kesar Masala )
Condensed milk - 4 tbsp (for richness)
Almonds For Garnishing
Extra Milk if required!!

Method
- Boil milk in a heavy bottom pan, As it starts boiling add soaked sago along with its water also add vermicelli and semolina. 
- Keep stirring as you add, because semolina tends to becomes small balls when not in stirring mode
- Once it starts boiling add sugar as much as needed, add condensed milk too. 
- Keep over low flame and allow it to cook for 15-20 mins. Keep stirring every 5-10 mins clearing the sides, and also in case it chars!! You can do Your other works mean while but be attentive to kheer as well!!
- Check for Sugar if needed. Add the flavorings close the lid and allow it to rest.
- After half an hour we can find flavors have infused quiet well. and vermicelli has got a wonderful volume by now!!
- Just in case you find your kheer very thick, you can always adjust it will boiled milk as desired
- Garnish with almonds and serve Chilled!!!

Note:
Water used here is not too much!! Vemicelli, semolina and sago has the tendency to soak moisture as it cooks and cools, Kheer will show thicken as shown in the below pic. So always have extra little of milk ready to adjust the consistency according to your likeness.


Similarly I cannot speak about the sugar because to my observation I had added lots of sugar and still somewhere it felt lessen sweet to me, I asked my mom to taste and I added more sugar than I would actually like to use. But yet after sometime it dint feel too sweet. The reason is Sago, vermicelli and semolina has tendency to absorb all the flavors moisture and also the sweetness :) so do not worry if this happens to you!!


This pic shows small pot with thick condensed kheer can be served with puri and paratha or as it is, and larger pot diluted with some added milk which was perfect to be served individually as dessert

Adding semolina was not in my idea list :D but since I felt kheer needs some volume, I roasted semolina and added after adding sago n vermicelli. But you can add it before along with vermicelli n sago. Semolina gives wonderful volume to kheer. you can skip if you dont want and add cashew paste of soaked basmathi rice paste instead for good volume :)


Kheer Boxes packed and refrigerated to be sent!!


Make the Kheer and Enjoy it chilled!! 

Serving Suggestions:
1) Add more milk to the kheer and serve it as a manageable drink in disposable glasses serve it chilled.
2) Let it chill and thicken on its own, serve it as dessert in bowls with spoon.

Let me know your thoughts about this Delicious Yumm :)
Until next cya Bubye :)


Continue Reading

Sunday 21 June 2015

Quick Kanji - 30 mins and done!!

After 2yrs of blogging Finally I'am down to blog about kanji. Every time I click pics and want to post and each time I fail to do so.


Today is the day when finally I decided to post a quick and easy recipe as I finished my prayers and got free. 

To People who dont know what is kanji
Kanji is a porridge made of rice mixed with spices and protein. Sometimes lentils are also added for a better taste which makes it more rich in protein content. It is specially made during Ramadan in south India at almost every household and also it is made widely in mosques for free distribution among the people who are fasting.

Anyone who does iftar in mosque gets for free, also distributed among households to anyone who comes with a container to take kanji. It is said that kanji cools the heated up stomach, gives high energy as it is made up of rice (its starch is used as well) Some amount of lentils, non veg and veg is added for protein and vitamins making it a full meals on its own. There are many variations of making kanji and nothing can beat the other. 

Where starting from hyderabad to north delhi lucknow and other places haleem and khichda is dominating I can frankly speak that haleem and khichda carries lots of fats content very rich in nature and also very tideous to work with, draining our energy!! can be consumed limited due to its richness

When we speak about kanji, it is light, filling and nutritious in nature. Consumes less time and energy to be made. Kanji can be consumed till ur tummy fills in ;) trust me at this part :) sometimes people cant stop with just 1 serving, they want more more and more......

Here goes the recipe.

Ingredients:
Rice 1 cup
Moong daal 1/4th cup
Fenugreek seeds - 1tsp

Soak these together over night in water and ready to use next day!! This step is optional but I do it as it yields quick cooking and helps no gastric formation which can be caused by moong daal sometimes. 


Ingredients:
Green Cardamon - 3
Cinnamon - 1inch
Oil / Ghee - 2tbsp
Chicken Mince / Mutton mince - 1/2cup
Ginger Garlic Paste- 2tbsp
Turmeric powder - 1/2tsp
Chilli Powder - 1/4th tsp or more according to your taste
Tomatoes - 2 medium roughly chopped
Curd - 1tbsp (optional)
Salt to taste

Keep ready Coconut milk extract out of 1small coconut of half of 1 large coconut. This will include 1st milk and 2nd milk also 3rd if possible. This will be used at the end step.
Coriander leaves to garnish

Method
- In a pressure cooked add oil/ ghee allow it to heat.
- Once heated add cardamon and cinnamon stick, let it splutter, add all the other ingredients and saute it for a min or two.
- Add soaked & drained rice into the cooker and add 6-8 cups of water.
- Pressure cook it for 2 whistles and allow it to rest till the pressure release.
- Once pressure is released open the lid and mash it with a daal masher add coconut milk + water and adjust the salt.
- Bring it to boil once. Check the salt garnish it with coriander leaves. 
- Serve Hot with your iftar :)


Notes:
- You can use whole pieces of boneless chicken and shred it later once its cooked and add it back to kanji.
- You can use chicken, mutton or beef as you like.
- You can add veggies of your choice.
- This proportion is perfect for 6-8 members in a family. You can adjust the proportion of rice to moong daal from 1/2 cup rice + 2tbsp moong daal for 4 people and 1/4th cup rice + 2tbsp moong daal for 2 person. Adjust the spices and other ingredients accordingly.
- You can add all the ingredients into pressure cooker including coconut milk minus some cups of water mentioned above and cook it around for 2-3 whistles. Lets the steam release open the lid and mash the content, Add more water to make it liquid if required. Adjust the salt as needed boil it once and serve.

For Vegetarians:
Add vegetables of your choice like Carrot, peas, beans, cabbage etc.  To substitute non veg chewy thing add paneer pieces finely chopped or add soaked n boiled soya (cut into pieces) 
* paneer n soya are great non-veg substitute for rich protein in this whole meal :)


Impression:
When I 1st opened the pressure cooker I felt oops so much of haldi? (turmeric) how will others eat but then I had no option other than to continue with the process. Once I added the coconut milk it gave me a lovely vibrant pleasing yellow color. I felt a gr8 wow inside!! so dont panic if you find it yellow yellow mixture before adding coconut milk :)

This was my 1st try with kanji coconut milk and the result was mind blowing. 
My dad loved it as I do :) We had 2 bowl full without hesitation Tummy full hum dono khush khush :D
My mom was skeptical about it, as always :P she has her own ways of cooking and taste.
As she ate I kept watching her. Its her nature to try new things with a expression of refusal lol :P After having one bowl I asked if she wants more, she said no. within few mins she said give me more, me aur khush :P atleast my trial and pain to create something new dint go in vain. She loved it too. 

So do not hesitate to try this recipe its really yumm and easy to make light on tummy specially for iftar :)

Got more kanji recipes which will be shared shortly, Until then Cya!!

Dont forget  write back your views, Quires, and your trial with my recipes in comment section, for sure it will help newbies of cooking!!


Continue Reading

Wednesday 20 May 2015

Chicken Pulao - Inspired By Chicken Dum Biriyani

A Delicious!! One Pot Meal To Be Tried.... 


I'am not a biriyani lover but occasionally help my mom making biryani her way takes place sometimes. I made chicken dum biriyani myself once and that was suppose to be surprise shocker to my whole family. This pulao is very much inspired to the chicken dum biriyani. And total justice is done to the dum biriyani via this simple chicken pilaf. There was no regrets to shortcut here!! 

Definitely nobody can deny how yummy it was, and specially when everything is finished by night I can breath well.... Lol...  yess!!!

Ingredients 
Rice - 1kg (5 cups, Soaked in water for 30 mins minimum)
Chicken - 1.5 kg
Potatoes - 2 large or 3 medium size Cubed n fried till golden brown
Onion - 1 large or 3 medium size Sliced
Garam Masala- 1tsp
Turmeric Powder - 1/4th tsp
Chilli Powder - 1/2 - 1tsp
Coriander Powder  - 1tbsp
Yogurt - 1 cup
Ginger Garlic Paste - 2- 3 tbsp
Salt to taste.
Whole Garam Masala ( 3-4 Cardamom, Cloves each, 1inch cinnamon stick, you can add nutmeg n star aniseed if u like, I did not) 
Mint leaves - 1/4th cup / 4-5 tsbp 
Coriander Leaves - 1/4th cup / 4-5 tbsp
Oil - 5-6 tbsps or more if required (this should be enough coz fried potatoes will ooz out its oil during cooking process.
Water 9 cups  + Milk 1 cup to the standard measurement in which rice has been measured. 
Yellow Food Color a pinch I did not use.
Sugar 1/4th tsp

Pre Preparation. 
- Soak Rice With lots of water 
- Blend Yogurt With Mint leaves and Coriander Leaves
- Marination of Chicken - Add yogurt, all dry spices, ginger garlic paste and some salt. Mix it well and allow it to rest atleast for 1 or 2 hrs The more marination time allowed more flavorful the chicken gets!!


Cooking Process:
- Heat Oil  a pot which can hold 1kg rice. Once heated add whole dry spices allow it to splutter.
- Add in Onion and fry it till it start getting light brown in medium flame, Make sure it does not burn, just golden in color. 
- Add in the marination and cook it in high flame and mix it well. In the process you will get a nice strong aroma bursting inside your kitchen. 
- Cook this till the extra moisture from chicken and yogurt gets evaporated, This should take 2-3 mins in High Flame. Add sugar too!!
- Once this is done Add in Water + milk, and Potatoes to the pot and wait till it starts boiling. Check for salt, add more if needed!
- Mean while Drain out water from soaking rice to the maximum no extra liquid should remain.
- When it starts boiling Add in the rice and allow it to boil again. 
- As it boils, water in the pot starts to get absorbed. Stir in with spatula once just for even mixing.
- Once u see rapid bubbles of water are fading and rice is almost looks half cooked. Cover the pot with a tight lid and low the flame to the most lowest mode possible.
- Leave it in dum for 12-15 mins and Switch of the flame.
- Allow it to rest for 30 mins. Open the lid and mix it all gently. 
- Serve it With Raita!!


Everything is well explained above. 
I did not use any food color

My Version is Darker in shade for 2 reasons,
1) I dint wanted to use fried onions separately as it will consume time and also add more oil content to the dish so I decided to Fry the onion golden brown in 1st step itself. This in turn boosted the flavor of whole dish. If you want, follow the recipe as it is or avoid the 2nd step go right away to the 3rd step by adding chicken to the oil then proceed. Have fried onions separately mix it while serving this will also give a unique taste to the pulao.

2) I added 1cup cup of mint and 1 cup or coriander leaves (had loads of it lol), which again contributed to the darker shade. So make it 1/4th cup to half cup maximum this also boosts up flavor


Though this recipe and my explanation looks long, But once you got the ingredients and pre preparation work done!! Then Cooking is Just A Jiffy!!

Do try and let us know in the comment section This will help others to know more about ur experience and the recipe!!

Cya Until next Bye bye


Continue Reading

Tuesday 21 April 2015

Raw Papaya Stuffed Parathas

Its the most simplest & Yummy Stuffed Parathas You can ever Make.........


We are very fond of papayas!! Raw or Ripe Both are considered as a treat in my family!! I sometimes take a chance to make Raw papaya salad for myself and Mom's regular thing would be to make mixed veg gravy where papaya would be rock star giving the whole dish its sweetness to be enjoyed with rice and some spicy side dish.

My mom had asked me if I want raw papaya this time, I replied leave me a piece that would do. But may be she asked my bro if he wanted it to do something Im not sure where it cropped up from, My mom informed me that my bro wants to have papitey ka paratha. For a while I was dumb stuck coz It was almost 20yrs back from zee tv I tried making paratha once of the same and how delicious it was :D I remember we enjoyed it!! But that seemed to be 1st and last, never got raw papyas in chennai so easily until recently!! so I had to recall and yes a little bit of browsing from sanjeev kapoor again :D How Can I Forget Him, He Is The 1st Chef I Followed and Loved Watching Him Closely. I feel he was cute then lol :P 

Getting Back To The Recipe. Measurement For 3 Big Size Parathas as shown in pic. 

Wheat Flour Dough - as per ur need soft and nice

For filling
Raw Papaya Grated - 1.5 cups
Cumin - 1/2 tsp
Chilli powder - 1/4th tsp or green chillies chopped - 2-3
Dry mango powder - 1/2 tsp
Chat Masala - 1tsp
Garam Masala - 1 tsp heaped
Coriander Leaves
Salt to taste
Oil / ghee - to shallow fry, I used both

Method:
- Mix grated papaya with salt and leave it aside till you are ready to use
- Squeeze Grated papayas nicely to remove all the extra water it has emitted. Make sure no water remains everything squeezed out nicely.
- Add the other ingredients mentioned above except oil and mix well. Add some more salt to this. 


- Roll the wheat flour dough a little and place the stuffing as shown above
- Start bringing the sides of the dough to the center pinching all the sides 


- Like the pic above!! Now slowly and firmly in between the palms smoothen the stuffed ball, keep it over rolling board and press it flat gently. No Hard Pressures should be applied. Here by very soft  gentle rolling and handle with care has to be done.


- With the help of dry flour gently start rolling the parathas slowly and softly. sometimes there would be air bubbles formed while rolling, Ignore it, continue with ur soft touch Rolling until a uniform / standard size and shape has been achieved

- Lift this paratha and put over hot iron skillet and cook till both sides done. I 1st used oil a little when it was getting cooked, Once it started forming faint dark spots I added ghee and flipped both sides till nicely done. Adding ghee at last lifts up the flavor. Can use butter instead choice is yours


- While we cook it over iron skillet or non stick tawa when we see the rise of parathas while cooking it gives an immense happiness of perfect rolling and even distribution of stuffing. Parathas will not puff up when firm pressures are applied while rolling and the layer of dough is sticking to each other.  Basic thing to do for puffing up of roti or paratha is put it over hot pan, you will see color changing within 15-20 secs, flip the paratha. Allow the other side to cook till some dark spots r found, again flip the paratha and you will see how nicely paratha will puff up. Unlike roti's which will show some air pockets, parathas will show little bit of puffing and nice aroma is emitted.

To have crispy and flaky parathas make sure u cook it in low medium heat. Spread some oil too as said above and toast till done. 


Check out the above pic for the crispy flaky edges. This texture will remain for very short time So eat it quick to enjoy the goodness. After sometimes It will be soft and get little bit darker in the shade (this is the case with all stuffed parathas). Yet Yummilicious and enjoyable!!

Eat it with Pickle, Yogurt Or Raita And Love ur trial with this yumm dish

* I have added spices according to my taste, You can adjust the same when using more quantity of papayas. But always make sure the fillings spice and salt should always be more as if u cant eat it just like that. It should be little stronger than your taste buds can accept. 

Reason: Wheat flour dough is bland in nature and will be covering the whole stuffing around. So while eating It will be a perfect combo. In case if very light spices r used for filling parathas are not much enjoyable. This is my personal experience over stuffed parathas making, I learnt this trick myself when I was doing trial and error in making  paratha long back :D 

That's it for today :) Hope u make n enjoy one urself!! Any doubts or quire feel free to ask me in comment section!! Check back or click notify me check box to know the response.

Cya until next :)


Continue Reading

Thursday 9 April 2015

How To Make Perfect Pilaf / Pulao - For Beginners

My dream for making pilaf holding back those long grains rice without breaking has come true


Seeing basmati adds in rice the pilaf they display so long grains shown, so fluffy and looks so nice. This always made me wonder if it is possible to make the same kind at home, But something for sure not certain in those adds, My next doubt would be, was it well cooked? or they just show us all this for sake of showing? 

I was always skeptical making pilaf I dint knew how it would turn out. Though Ive used so many recipes with left over rice  without fail. But working with fresh grains of rice was always doubtful.
In last 1yr Ive tried various recipes and experimented over rice its quantity etc etc and finally I'am here with a genuine method to work with basmati rice, other variations of rice as well, to cook pilaf / pulao without making it look mushy Or extra greasy in nature.


Basic method to try For proper understanding I recommend you to read the whole article carefully. Though its very simple but I have added some extra points for better understanding 

Ingredients:
Rice - 2 cups
Water - 4 cups
Oil - 3-4 tbsp
Salt - As required  (dont forget to check notes)

Method:
- Soak rice in clean fresh water for about half hr or more. Remove extra water and keep it aside in a strainer so that any more extra water drips out
- In a pan add oil add some whole garam masala if needed allow it to crackle 
- In Oil add water and allow it to boil (rapid water bubbles are found)
- Add salt and rice cook in high flame till the water is almost absorbing yet little water remains. You may see faint water bubbles popping up at this stage.
- Close the pan with a tight lid and cook this for about 10-12 mins in lowest flame possible.
- Switch of the gas after 12 mins and Allow it to rest for 20 - 30 mins
- Open the lid and fluff the rice. 
- Serve it hot with any thing desired.


Notes:
- Soak it for half hr or even soak it for 2hrs or more should not be the concern. In fact more soaking will give us well cooked rice.
- Drain out the rice nicely before adding it to the boiling water, This will make sure no extra water goes in more than what is needed
- It is very important that u do not mix the rice with spoon after adding it to the boiling water. Rice will get mixed to the water and the other content on its own as it is boiling. But still if you are not sure that proper mixing can take place on its own, you can mix the content inside the pan just once with a spoon. And allow it to cook as mentioned above.
- Cooking it for 10-12 mins in lowest flame is apt time. Do not exceed it to more. As we r going to giving it resting time for 20-30mins after done, Rice will bloom on its own in this duration and get a well formed shape when we mix it later. So no need more cooking duration
- You need not add to much of oil thinking this will help rice grains stay fluffy and nice. According to me oil or fats play very little role in the concept behind. Oil or fats can be used enough for tempering. Not needed that whole of ur rice grains should look greasy. I tried making pilaf with minimum oil always. But when my mom makes she has her own reasons and logic behind so much oil used. In the above pic you may see not much of oil / fats are found but Its just perfect for the purpose!!
- In the shown pics I have also used daal. I will share the recipe next for this pilaf Insha Allah
- When you add veggies to pilaf you need not increase the water ratio until its required. You may either pre boil the chopped veggies ahead and use its water for measurement to rice for nutritional purpose, or cook the veggies in oil for 5 mins till half cooked and proceed with the above method of adding water and rice.


Previously I had refereed so many blogs and you tube links for proper method but my try would satisfy me only little, either the ratio or cooking time varied would leave the rice over cooked or undone, Though it may appear to be cooked but my family likes to eat rice which is soft while eating.  I always wanted to make pilaf which is soft as my family likes, yet it should not be too much greasy and hold back its shape without being too much mushy. So after so many trial and errors this is the final result of the best I could achieve and share with my readers,  Do try if u had been struggling like me to get a perfect pilaf. And share ur results with us!! 


Continue Reading

Friday 3 April 2015

Banana Cake - Simplest Cake For Beginners

A big warning this cake is very addictive..... :D

Ever Since I Started Baking Banana Cakes Are My All Time Favorite. And Here Is My Most Amazing Post And The Best Recipe I Tried So Far........ Do Check Out :) 


One of little cousin sister age 6 likes cakes so much that she demands cakes instantly. I want cake now now now make cake for me!! And another cousin sis who will turn 5 now is picky eater. But the way both makes demands for every little thing makes me and my bro feel OMG look at them? I dont recall we did something like this when we were growing. Generation is Changing and me being in late 20's already feeling old in front of these kids. They R super smart and exactly know what they want. All of above when they talk it may make us shake our heads in disbelief if it was those little mouths and tiny sizes spoke out those. I'm sure many should be like me thinking the very way I do. But I guess its High time for me to accept that New Generation is Fast & we R Old..... lol  I seem to talk like my mom here haha

Getting back to the recipe, little kids are just an excuse for my baking and I love it. When brought lots of bananas from market I wondered why? Sometimes she is crazy I believe ;) When she offered me to have one I said give me 2 i'll bake it. So that was just an instant plan to make banana cake. 

I dint make any banana cakes past 2yrs I donno how I missed it but its never too late!! I tried browsing so many recipes but nothing satisfied me. So I decided to Tweak my chocolate Beetroot cake recipe into banana with some orange rinds. The result was just fab!!


Ingredients:
Bananas - 2 large
Eggs -2 Or 3/4th cup Yogurt
All purpose flour - 1 1/4th cup
Oil - 1/2 cup
Sugar - 3/4th cup
Orange rinds - from 1 whole orange (see notes)
Soda Bicarbonate -1tsp

Ingredients Simple Right?

Method:
- Blend bananas, eggs, oil, sugar together with blender or mixer till fine paste.
- Sieve Flour and soda bicarb together and keep it ready.
- When you are ready to bake, Mix flour with wet ingredients. Whisk it slowly or use spatula, do not over mix.
- Also add orange rinds while mixing. 
- Line a round tin with baking paper. Bake until skewer inserted comes out clean.
- Once done let it rest for 15-20 mins, Flip it to cooling rack and allow it to cool nicely. 
- Once Cooled Cut into pieces and Serve with tea and snacks.


Notes:
- Originally vanilla essence is added to this cake when ever I tried earlier, But this time I dint had vanilla essence so thought of substituting essence part with orange rinds, You can also make use of lemon rinds. 
- I baked this on stove top. It took 40 mins. Baking in oven would be 170C for 25-30 mins. Banana based caked gets done sooner than others
- If you dont have a butter paper to line the bottom of cake tin, Just grease the pan with oil / butter and dust the flour over it!  coat the flour around the greased area and remove the extra flour by tapping the tin upside down. (dont add to much of flour for dusting just add enough to coat the inner area)


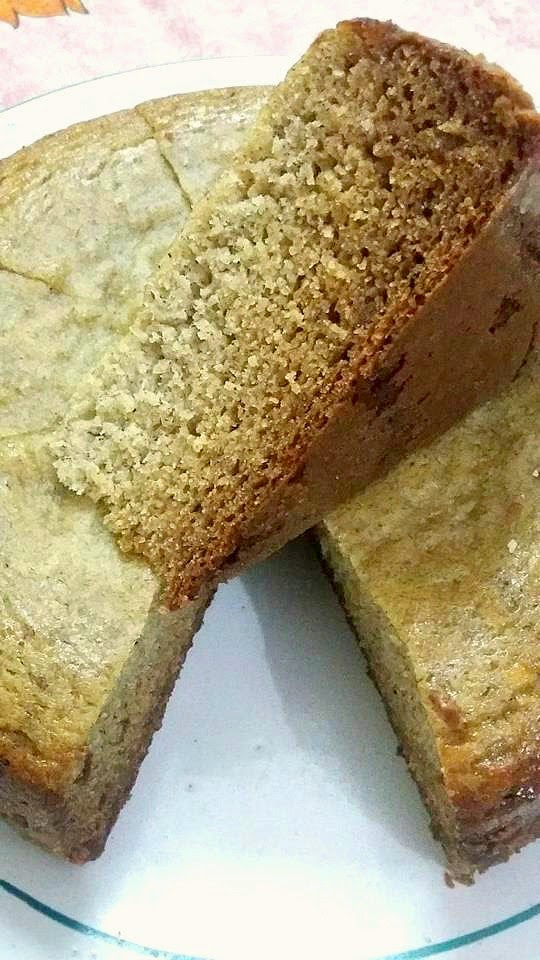
I fell in love with the shade it got, It was unexpected!! Polished glossy shine sparking to my eyes :)


I was wondering why center looked so dry!! But I was sure that banana cakes would never fail. It was very spongy on the whole when I flipped it upside down :) 


After Cutting the cake was another surprise :) I guess I over baked it by 5 mins more. I forgot that banana cakes get baked quickly. 
I saw it has got 2 color layers on its own and I loved the shade to the core.


Dosent it look fab??? 

Impression:
Cake tasted very nice as good as it looks in the pics 
It was soft porous and spongy. Idle for tea time snacks. To offer these goodies to little kids and make them happy.
Orange rinds gave it a kick in taste I loved it over all!! And every one in the family loved it too :)

Do try ur hands in this wonderful cake!! And let us know how it turned for u :)

As mentioned above its very addictive u really cant stop with one!!

Continue Reading

About Us

Designed By Seo Blogger Templates- Published By Gooyaabi Templates